HVAC Maintenance · 20 minutes · ~$15
How To Change Your HVAC Filter
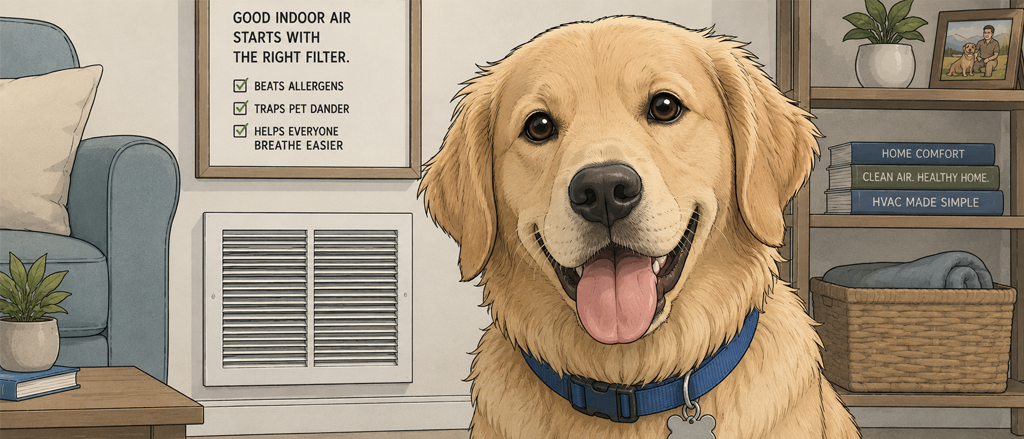
A fresh air filter is the single cheapest thing you can do to protect your HVAC system and the air quality in your home. Clogged filters force your blower motor to work harder, raise energy bills, and shorten the life of expensive equipment. This guide walks you through every step — from finding the unit to setting a schedule so the task never slips through the cracks.
-
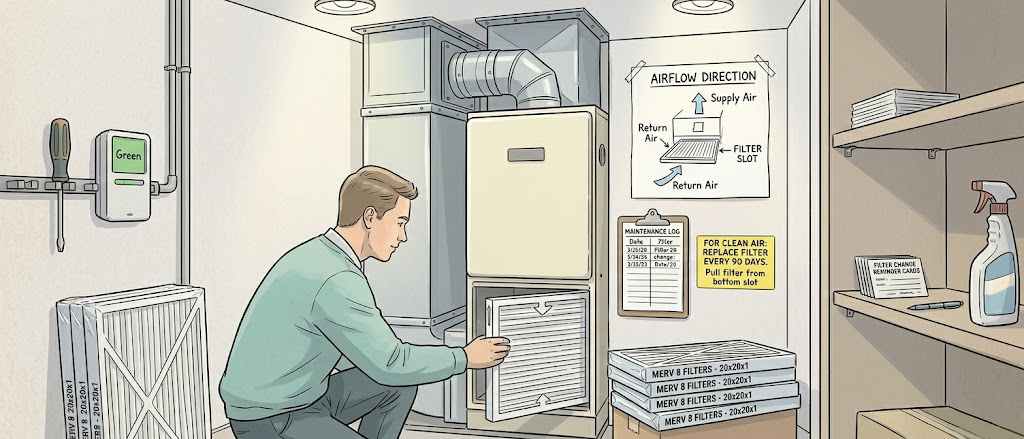
Locate Your HVAC Unit
Your central air handler or furnace is the heart of the system — and usually where the primary filter lives. Common locations include:
- Basement or crawlspace — the most common spot in older homes; look for a large metal cabinet near the water heater.
- Utility or mechanical closet — often a dedicated closet in a hallway, laundry room, or garage in newer construction.
- Attic — common in warm-climate homes where cooling is the priority; the unit sits on a platform above the insulation.
- Interior closet — townhomes and condos frequently hide a vertical air handler in a bedroom or hallway closet.
Tip: If you can't find it, follow the largest duct. Ducts radiate outward from the air handler like branches from a trunk.
-
Identify All Filter Locations
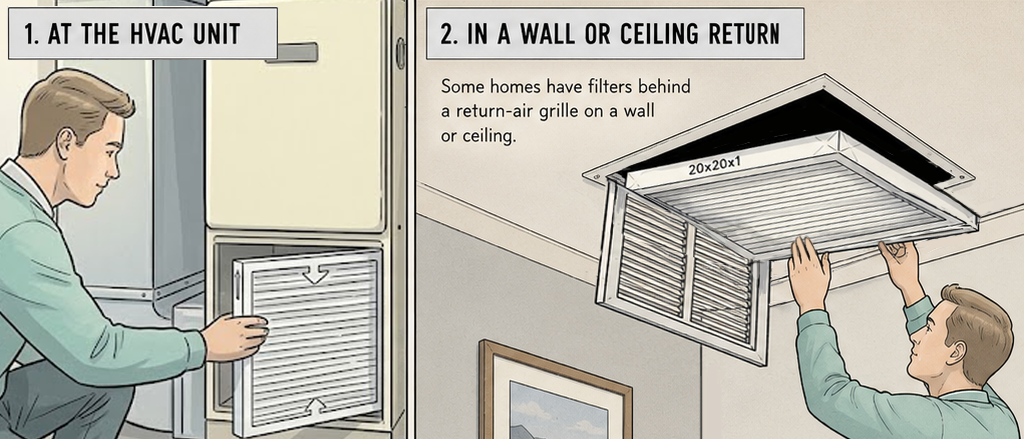
Many homes have more than one filter. There are two common arrangements:
- At the unit itself — a slot on the return-air side of the air handler (before the blower). This is almost always present.
- In wall or ceiling return-air grilles — large louvered grilles throughout the house that pull room air back to the unit. If a grille has a frame deeper than ¾ inch, it likely holds a filter. Hold your hand near it — if you feel suction, air is returning through there.
Tip: Walk every room and note all large vent grilles. Supply grilles (which blow air out) are usually smaller and won't have filters. Return grilles are larger, often 16×25 inches or bigger.
-
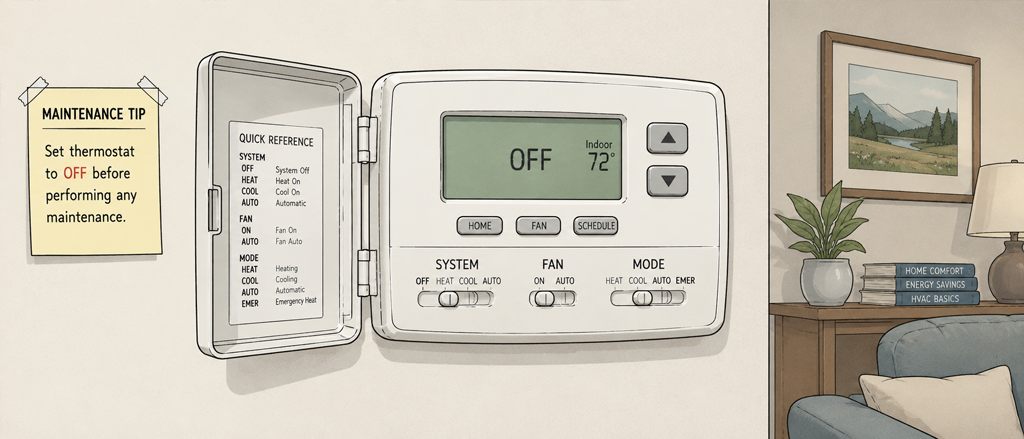
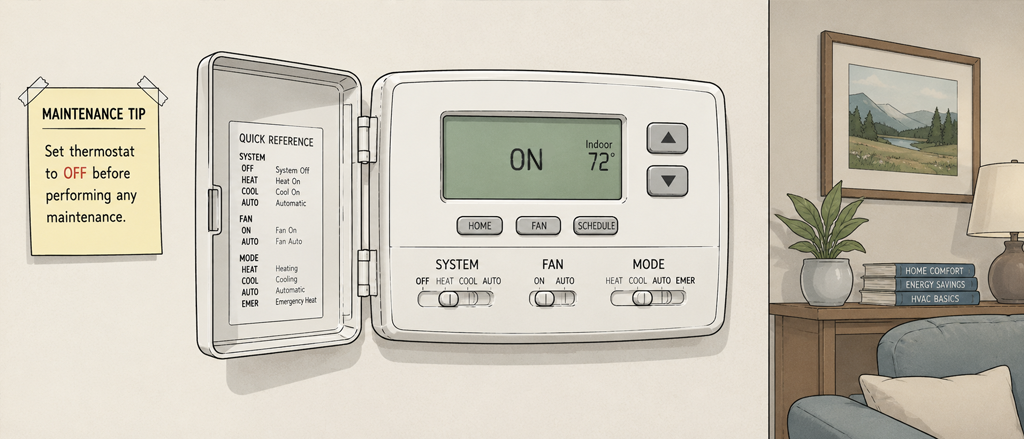
Turn Off the System
Before touching any filter, switch your thermostat to Off. This stops the blower from running while filter slots are open.
Why it matters: A running system creates strong suction at the return. Pulling a filter out while the blower is on sends a burst of unfiltered air — and whatever dust is on that old filter — straight through your ductwork and back into your living space.
-

Remove the Old Filter and Note the Size
Open the filter access panel or remove the return-air grille cover. Slide the filter straight out — they're not clipped in. Before you toss it:
- Read the three dimensions printed on the cardboard frame, e.g. 16 × 25 × 1 or 20 × 20 × 4. The third number is the thickness.
- Note the airflow arrow direction — you'll need to match it on the new filter.
Tip: Slide the dirty filter into a garbage bag immediately. Old filters are loaded with dust, pet dander, and sometimes mold spores — you don't want to carry it through the house open.
-
Choose the Right Replacement Filter
Match the exact dimensions — even a half-inch gap lets unfiltered air bypass the filter entirely. For MERV rating:
- MERV 8 — the standard choice for most homes. Captures dust, lint, pollen, and mold spores. Good balance of filtration and airflow.
- MERV 11–13 — better for allergy sufferers or homes with multiple pets. Captures finer particles but creates more resistance; confirm your system can handle it before buying.
- MERV 14+ — hospital-grade filtration. Avoid in residential systems unless your HVAC manufacturer explicitly supports it; the airflow restriction can overheat the motor.
Tip: If in doubt, check your HVAC manual or the sticker on the unit itself — many manufacturers specify a maximum MERV rating.
-
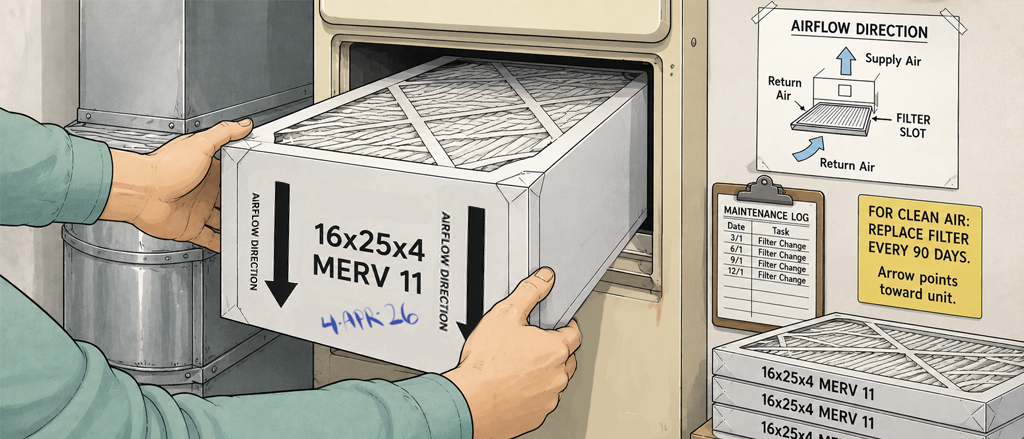
Install the New Filter
Slide the new filter in with the airflow arrow pointing toward the unit (toward the blower, away from the return-air space). The arrow should point in the same direction air flows — into the system.
- The filter should seat flush with no gaps around the edges.
- Close and latch the access panel or reinstall the grille cover.
- Write today's date on the cardboard frame with a marker — a quick visual check the next time you look at it.
Tip: If you have multiple filter locations, replace all of them in the same session. A clean unit filter paired with clogged wall-return filters still starves the system of airflow.
-
Set a Replacement Reminder
Turn the thermostat back on and set a recurring reminder so this doesn't become a "whenever I remember" task:
- 1-inch filters — every 1 to 3 months (lean toward 1 month if you have pets or allergies).
- 4-inch media filters — every 6 to 12 months.
- High-traffic homes (pets, smokers, heavy pollen seasons) — check monthly, replace as needed.
Tip: The easiest way to stay on schedule is to log the change in a home maintenance app like ManorKeep, which tracks your HVAC history and sends you a reminder when the next change is due — no calendar hunting required.
Quick Reference
Home maintenance, handled
Stop relying on memory for your home's upkeep
ManorKeep gives every room, system, and appliance in your home its own maintenance history. Log today's filter change, schedule the next one, and build a record that proves care when it's time to sell.
Join the early access list
Be the first to know when ManorKeep launches — and lock in free early access.
Get notified at launchNo spam. No credit card. Just an update when we're ready.