Kitchen Appliances · 20 minutes · Free
How To Clean Refrigerator Coils
Condenser coils are how your refrigerator sheds heat. When they're coated in dust, the compressor runs longer, energy bills creep up, and the lifespan of your appliance quietly shortens. A refrigerator that costs $800–$2,000 to replace can often get an extra 3–5 years just from a 20-minute annual cleaning. This guide shows you exactly where to find the coils, what tools to use, and how to do the job right.
-
Understand Why Coil Cleaning Matters
Your refrigerator works by moving heat — pulling it out of the cabinet and releasing it through the condenser coils. When those coils are caked with dust and pet hair, the heat can't escape and the compressor has to run longer to compensate.
- Dirty coils can increase energy consumption by 15–30% compared to clean ones.
- A compressor that runs more than it should wears out faster — and compressor replacement often costs more than the appliance is worth.
- In warm climates or homes with pets, coils can become significantly blocked within a single season.
Signs your coils need cleaning: The fridge feels warm on the sides or back, the compressor runs almost continuously, food isn't staying as cold as it should, or you notice higher electricity bills with no other explanation.
-

Find Your Coils
Condenser coils are located in one of two places depending on when your refrigerator was made:
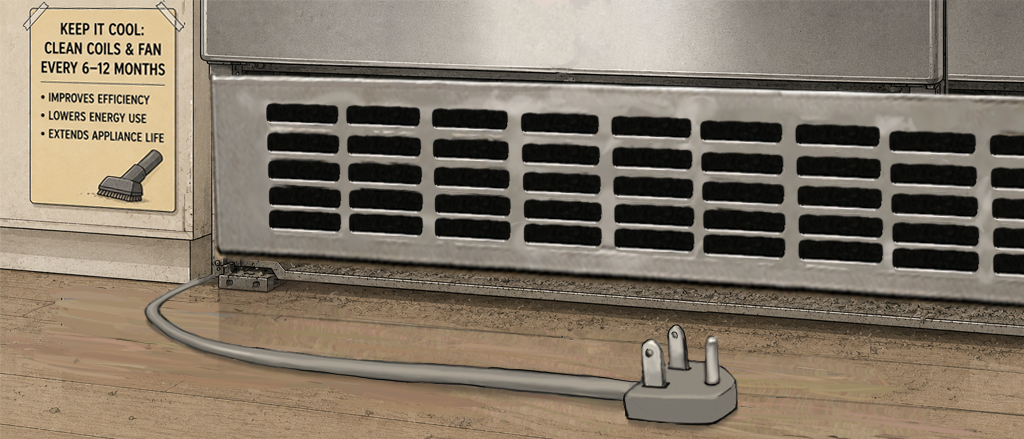
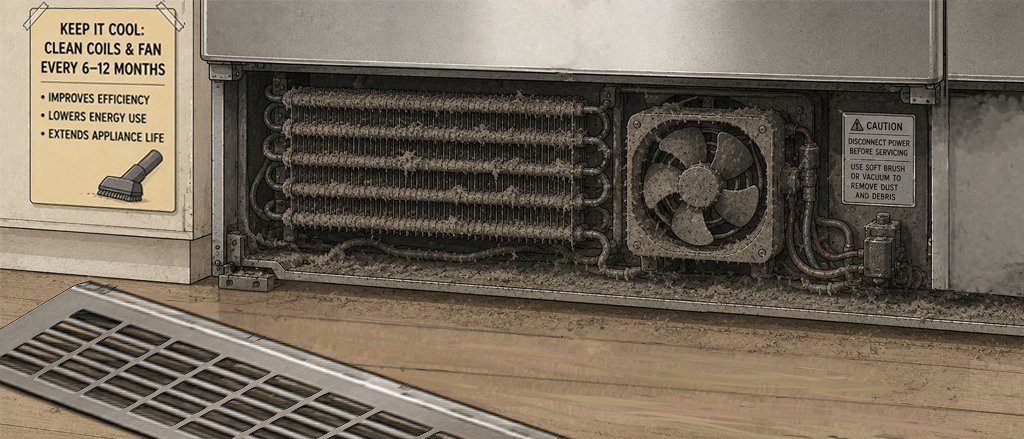
- Bottom-front (most common, 1990s–present) — behind the kickplate grille at the very bottom of the fridge. Snap or pull the grille off and the coils are immediately behind it. This is where the condenser fan is too.
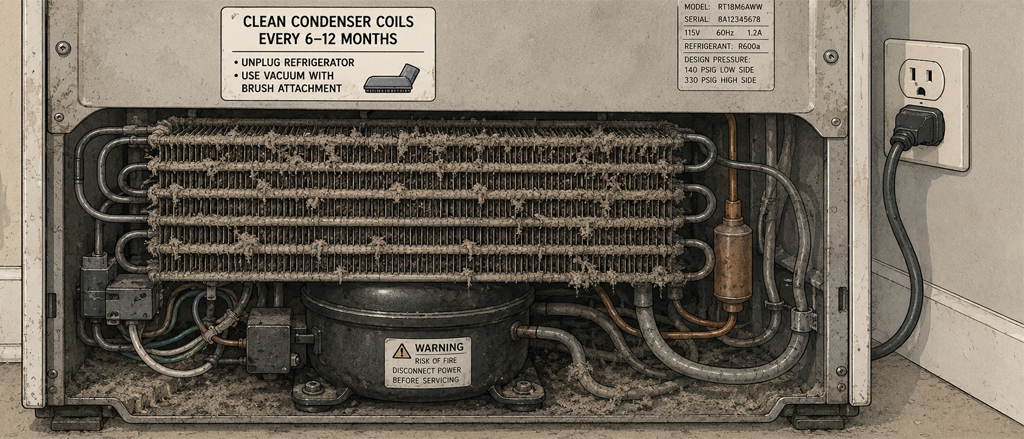
- Rear-mounted (older models, some compact fridges) — a black grid of tubes on the back of the unit, visible without moving anything.
Not sure which type you have? If there's a black plastic grille along the bottom front, you have bottom-mount coils. If the back of the fridge has an exposed grid of tubes, those are rear-mount coils. Your owner's manual will confirm if you're still unsure.
-
Unplug the Refrigerator
Before touching the coils, unplug the refrigerator. The condenser fan sits right next to the coils, and you don't want a brush or fingers near rotating blades while the unit is powered.
- If the outlet is behind the fridge and hard to reach, turn off the circuit breaker for the kitchen circuit instead.
- The fridge will hold a safe temperature for the 15–20 minutes this job takes — no need to move food out.
- If you have an ice maker or water dispenser, note where the water supply line runs before moving the unit — you don't want to kink or disconnect it.
Tip: This is a good time to clear the space around the fridge. Dust that accumulates on the floor behind and under the unit feeds right back onto the coils — vacuum the floor while you're back there.
-
Access the Coils
How you get to the coils depends on their location:
- Bottom-front coils: Simply snap off or unclip the kickplate grille at the base. Most clip on and pull straight toward you. No tools needed.
- Rear-mount coils: Carefully slide the refrigerator away from the wall — 12 to 18 inches is enough. Tilt the fridge slightly forward to engage the rear rollers, then push from the sides rather than pulling on the handles or door. This avoids stressing the hinges.
Tip: Place a folded towel or cardboard under the front corners before sliding — it protects hardwood and tile floors from scratches and makes moving easier on vinyl or linoleum.
-
Vacuum and Brush the Coils
Use a two-pass approach for a thorough clean:
- First pass — vacuum: Use a brush or crevice attachment to remove the bulk of loose dust and pet hair from the coil surface and surrounding area.
- Second pass — brush: Work a refrigerator coil brush (a long, flexible brush with stiff bristles — about $10 at any hardware store) between the coil fins to dislodge compacted debris. Move it in and out gently. Don't force it or bend the fins.
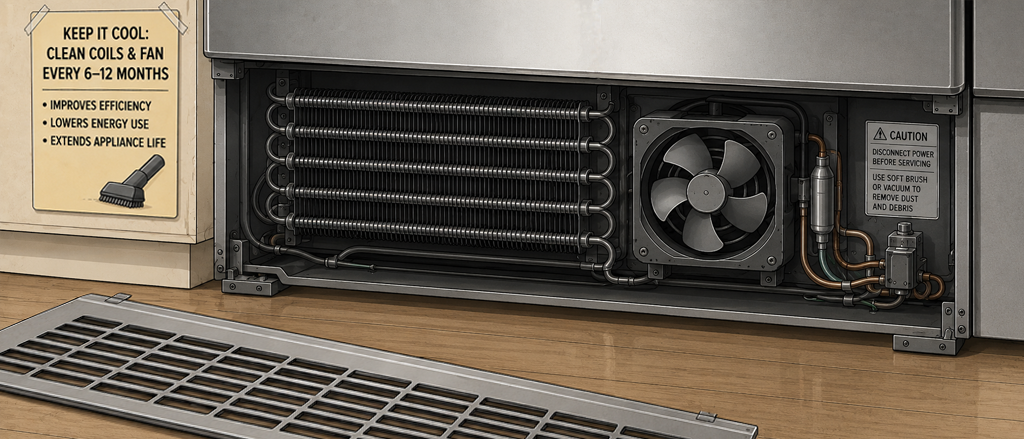
- Third pass — vacuum again: Pick up everything the brush loosened.
- While you're there, clean the condenser fan blades (the small fan near the coils) and the area around the compressor (the black cylinder or dome nearby). Both trap debris and both benefit from the same brush-and-vacuum treatment.
Tip: If coil fins are bent and restricting airflow, a fin comb (available online for a few dollars) can straighten them. Bent fins are common on older units and meaningfully reduce cooling efficiency.
-
Restore and Set a Reminder
Reattach the kickplate or slide the refrigerator back into place. Before pushing it all the way back:
- Check that the power cord isn't pinched between the fridge and the wall.
- If you have an ice maker, confirm the water supply line has a gentle curve — not a sharp kink — as the fridge goes back.
- Leave at least 1 inch of clearance at the sides and 2 inches at the back so air can circulate freely around the coils.
Plug the unit back in. Clean the coils once a year in most households. If you have pets — especially dogs or cats that shed — bump the schedule to every 6 months. Pet hair can fully block coil airflow within a single season and is the most common cause of premature compressor failure in household refrigerators.
Tip: Log today's cleaning in ManorKeep and note what you found — light dust versus heavy buildup. That baseline helps you judge whether the annual schedule is right for your home or if you need to clean more often.
Quick Reference
Home maintenance, handled
Stop letting small tasks quietly shorten your appliances' lives
ManorKeep tracks every maintenance task for your home — from refrigerator coils to HVAC filters to water heaters. Log the work once and let reminders do the rest.
Join the early access list
Be the first to know when ManorKeep launches — and lock in free early access.
Get notified at launchNo spam. No credit card. Just an update when we're ready.